DD-WRT as a Wireless Client Bridge
Written on 16.09.2024
If you live in a house where extending a simple networking cable would require a lot of work, you might find yourself buying something like a network printer and not being able to connect it to the network due to it not supporting wifi. These situations suck, but thankfully, there's a solution, the Wireless Client Bridge.
Okay, what the hell is that?
A Wireless Client Bridge is a device that helps your computer/laptop/smart fridge connect to the internet when a direct wired connection to your main router wouldn't be possible.
Pros:
- No need to spend ages googling your wifi drivers
- Better connections, as most commercial routers have better antennas than most commercial computers.
Cons:
- It's another appliance that you need to maintain and power.
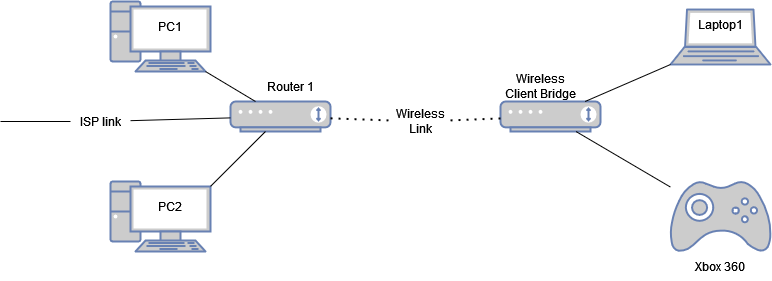
Here's a handy diagram of what we'll be doing today:
1. Setting up DD-WRT
It should be obvious that you must install DD-WRT on a compatible router. I decided for this setup to go with the old but reliable TP-LINK TL-WR1043ND. But you may be asking yourself, why use DD-WRT? Well, DD-WRT is simpler than alternatives like OpenWRT. That's it.
2. Initial setup
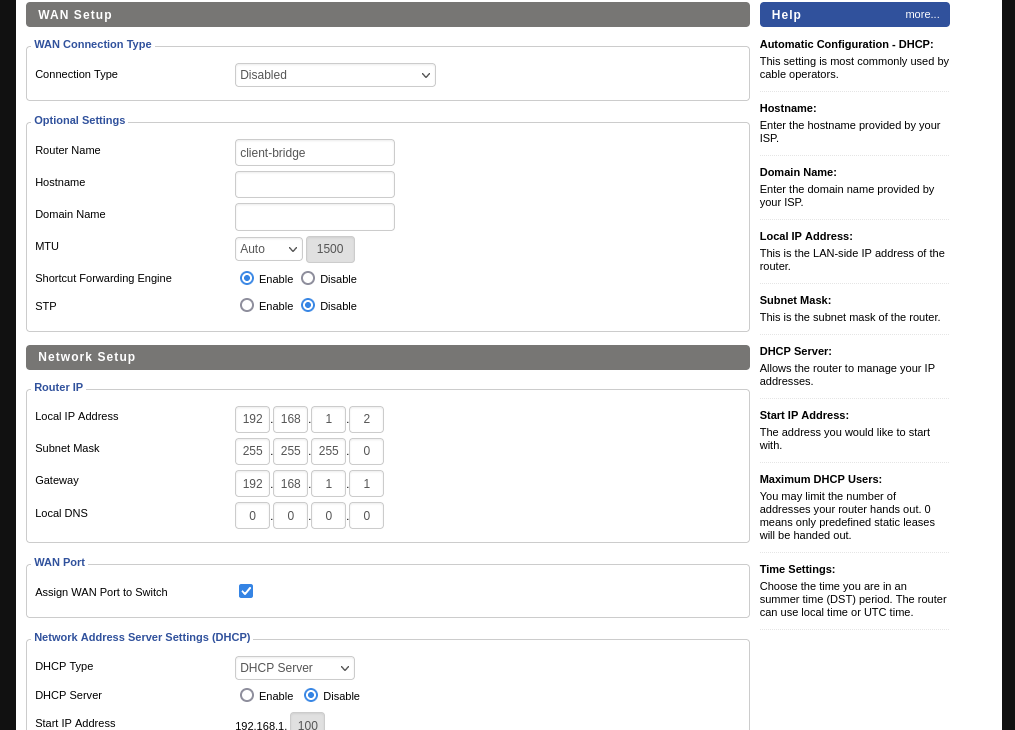
After flashing DD-WRT, you should go to the setup tab, and fill in the following:
- Connection Type: Disabled
- Router Name: Can be changed to anything
- Local IP Address: You need to select an IP address that is not already in use on your network. For example, I chose 192.168.1.2. If your network uses a different address range, such as 192.168.0.x or 10.10.1.x, you'll need to pick an IP from that range, like 192.168.0.2 or 10.10.1.2.
- Gateway: You must input the IP of your main router
- Assign WAN Port to Switch: Enable
- DHCP Server: Disable
Your settings should look something like this
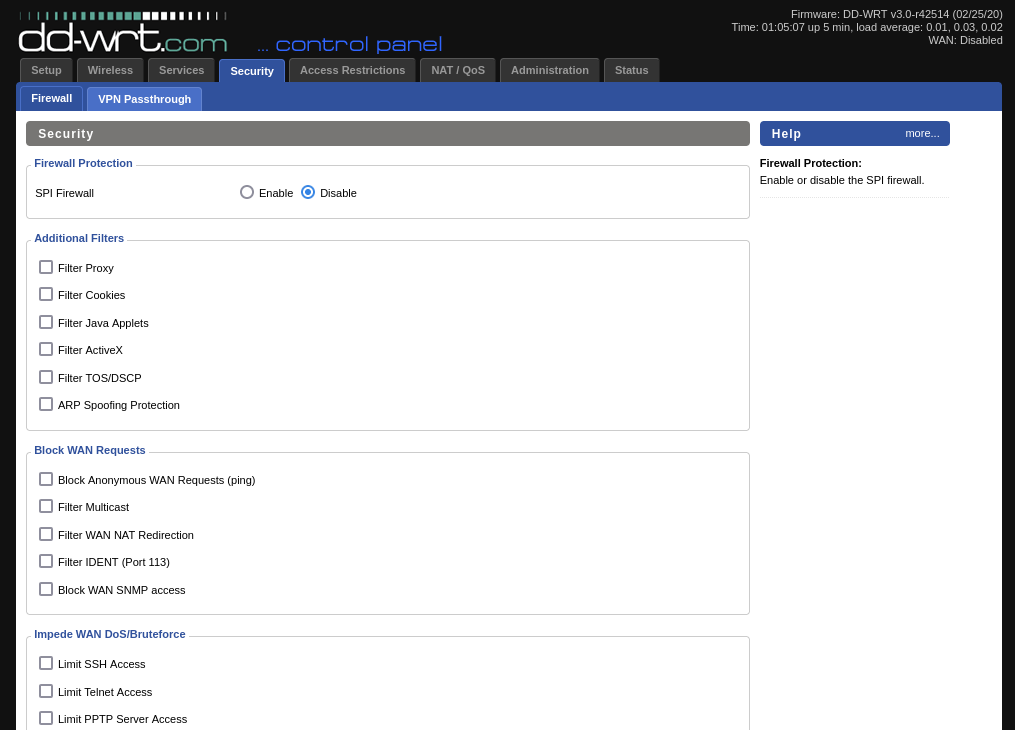
3. Disabling the firewall
This can be done via Security > Firewall
- SPI Firewall: Disable
Now you may be thinking why you'd disable the firewall. Well, that is handled by your main router.
4. Connecting to the wireless network:
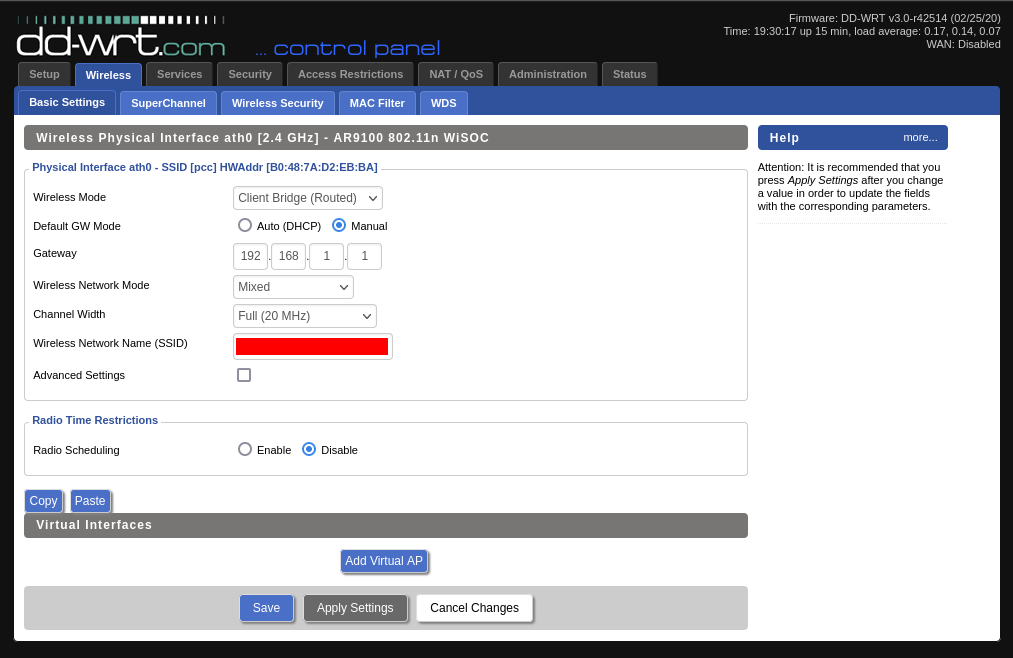
Go to Wireless > Basic Settings and fill in the following:
- Wireless Mode: Client Bridge (Routed)
- Default GW Mode: Manual
- Gateway: The IP of your main router. Mine's 192.168.1.1
- Wireless Network Mode: Mixed
- Wireless Network Name (SSID): Your SSID. I redacted mine.
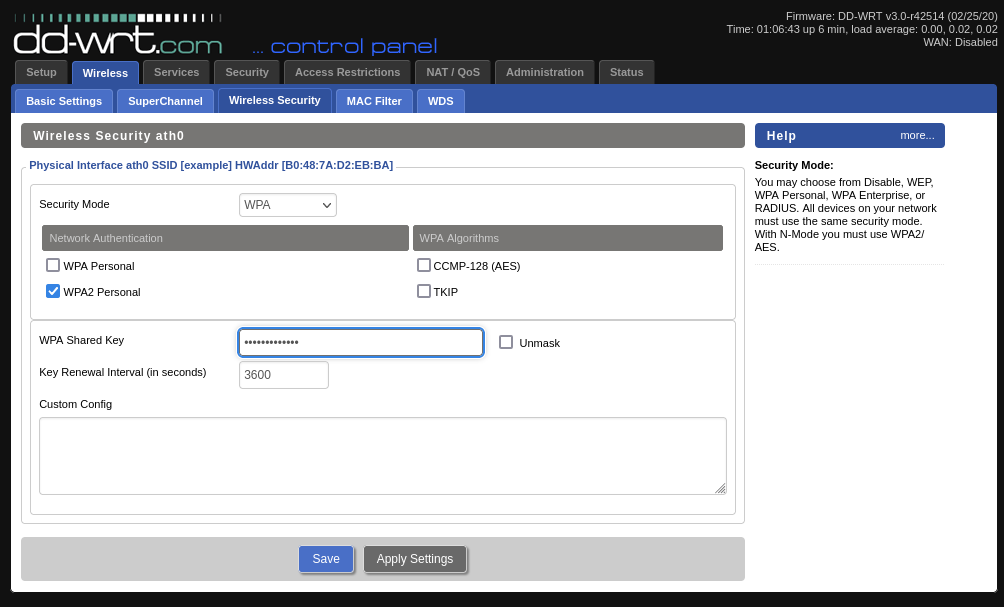
Now go to the Wireless Security tab and chose the following (these are the most common settings found on most routers):
- Security Mode: WPA
- Network Authentication: WPA2 Personal
- WPA Shared Key: your password
Now you can check if you configured the wireless stuff correctly by going to the Status > Wireless tab and reviewing the stuff there.
5. Profit
Now you can finally apply all the changes. You'll have to change to 192.168.1.2 or whatever IP you chose in step 1 for the router.
I am still a DD-WRT novice, so if I missed anything, or something doesn't work properly, please let me know.
"Life in liberty or death"